Archives for category: Baking

I love waffles.

For my last birthday I received a Cuisinart Waffle Maker from my mom, making waffles a breeze!

I’ve been experimenting with different waffle recipes I found across the web – mostly from Pinterest – such as egg nog or pumpkin waffles. These are more autumnal and christmas seasonal recipes, so I have been on the look out for something to tide me over until spring arrives. Enter the blueberry waffles.

Blueberry waffle recipe

I found a recipe on Pinterest from Pass The Sushi blog that piqued my interest. However, I altered her recipe slightly using buckwheat flour instead of wholewheat pastry flour and plain yogurt instead of sour cream giving them a slightly savoury quality, which acts as a nice foil to the sweet/tart blueberries.

This recipe yields 14 regular sized square waffles.  Since I’m the only one who eats waffles in my household, I bag them up in twos and pop them in the freezer, keeping in breakfasts for a whole week! When I’m ready to eat, I just stick them in the toaster and serve with plain yogurt.

IMG_7275

Et voila! Waffles for any morning.

For those of you with reservations about baking something special for loved ones this Valentine’s Day, Kenwood Chef have put together some video tutorials to show you how easy it is. Chocolate cupcakes are a favourite in my house and always a winner no matter the occasion.

Chocolate Cupcakes

Follow along to the video to make your own delicious chocolaty treats.

And here’s the recipe:

Makes: 12

Preparation Time: 5 minutes

Cooking Time: 30 minutes

Difficulty: Level 1

Method

  1. Pre-heat the oven to 180°C/Fan 160°C/Gas 4
  2. Ensure that your ingredients and equipment are at room temperature to reduce the risk of the mixture curdling.
  3. Place the butter and sugar into your mixer bowl and using the creaming beater cream on medium speed until it becomes thick and creamy.
  4. Beat the eggs to together, reduce the speed of the mixer and gradually add the eggs. Ensure that each addition of the eggs is properly incorporated before adding the next amount of the eggs.   Add a teaspoon of the flour after each amount of egg is added.
  5. Once the eggs have been incorporated add the flour, cocoa and baking powder and continue to mix together
  6. Place twelve paper cases into a muffin tray then divide the mixture evenly between them.
  7. Bake for approximately 12 – 15 minutes until they spring back when lightly pressed.

For the chocolate Icing:

  1. Melt the chocolate in a bowl over a pan of hot water; ensuring the base of the bowl doesn’t touch the water.
  2. Place the butter into your mixer bowl and using the creaming beater cream the butter on medium speed until it becomes paler in colour.
  3. Add the icing sugar slowly and mix to combine.  Ensure your splashguard is in place to avoid the icing sugar escaping from the bowl.
  4. When the icing sugar and butter are combined, mix in the melted chocolate until it is an even colour.
  5. Spoon the icing into an icing bag, and pipe onto the cooled cupcakes.
  6. Decorate with your chosen decorations.

And if you’re feeling a bit more adventurous, why not try Tiramisu to complete a romantic Italian inspired meal.  Kenwood Chef makes it easy!

*Disclosure: This is a sponsored post. I have not personally tried this recipe, however I do use a Kenwood Chef mixer and kMix hand mixer that I purchased myself.

New handmixer


Happy baking!

I can’t believe we are in the home stretch to 2013. 2012 has passed way too fast for my liking. Looking back through the photos which have documented this year, I haven’t been baking or blogging about baking nearly enough.

And though this has been a recurring sentiment, I’m getting back in the proverbial (blogging) saddle. Christmas is coming and the goose is getting fat. There’s going to be a whole lot of baking, eating, sharing and best of all a big trip to the motherland.

Stay with me, dear readers… but in the meantime, here’s a taste of what went on in the downtime:

Victoria Sponge

Victoria Sponge in honor of the Diamond Jubilee. Recipe from Primrose Bakery Baking Book, although I used fresh strawberries in place of jam and Earl Grey/Lemon whipping cream. This was my first go at the traditional British cake. I was happy with the way it turned out and will most likely bake it again when tradition calls.

Hepburns

My baking book of the year is definitely ‘Baked In America‘ – maybe it’s because I’m American, but mostly because this is one AMAZING baking book. Recipes from this book are featured many times throughout the blog in 2012 and will continue to be featured in the future. One day I’ll finally make it to Chiswick to Outsider Tart and hopefully meet my baking heroes – the two Davids.

The brownies above are called Hepburns (Kate, rather than Audrey) and probably the best brownie recipe around. They make ideal treats for any occasion – school fetes, birthdays or general parties.

Chocolate Cherry Cheesecake brownies

Brownie tower

These Chocolate Cherry Cheesecake Brownies were made especially for my mother in law’s un-birthday party. As her party food was served buffet-style, I wanted to make a special desserty treat that attendees could eat as little or as much as they like. So these brownies were cut into 1.5 in squares and served on cake stands mixed with the Hepburns featured above.

Orange polenta cake

Another series of books which have inspired breakfasts, dinners and baking alike are the Leon books. The Orange Polenta Cake is from Leon – Baking & Puddings, book three, as featured in the ‘Teatime’ section. This cake is an ideal accompaniment to Earl Grey tea and also gluten-free!

Trish's Two Cents

Martin has been working on building a set of speakers over at his dad’s house. I like to take a baked treat when we go over. One weekend in September, Trish’s Two-Cents from Baked In America caught my eye and I had to give it a go. This is the best ‘pound-cake’ type cake I have ever had. It is definitely going to be in regular rotation for when cakes are called for.

Pumpkin pie

And last, but not least, in the baking recap is Pumpkin Pie. This is a recipe traditionally served at Thanksgiving, in fact was featured in my Thanksgiving blog post from 2011, but I am not celebrating Thanksgiving this year so it was moved to Bonfire Night. While this recipe is from the back of a Libbys can, it is home-made with love and reminds me of autumnal days past.

Watch this space for Christmas treats to come soon…

In the baking world, whoopie pies have been all the rage recently. Having tried dried out and tasteless store bought versions back home in the US, I scoffed at this phenomena when it crossed the pond. I thought, “Why would people get into this ‘treat’ when it wasn’t all that tasty?”.
But then after reading about the origin of whoopies in Baked In America, I decided to see what the fuss was all about.

We’re big fans of gingery type cakes so the Shoo-Fly Whoopies recipe seemed the right place to start. Full of goodness like ginger and black treacle, I was suddenly coming around to the deliciousness that would be the whoopie pie.

Black treacle

If you’re not familiar, whoopies are like big cakey cookie sandwiches, filled with a cloud like creamy filling. They can be made into all sorts of different flavor combinations. The Shoo-Fly Whoopie is a take on the traditional ‘Shoo-Fly Pie’ hailing from Pennsylvania Amish country, also where the whoopie pie is said to come from.

Having lived in England for nearly eight years, I have become interested in the origins of regional baked treats and local traditional dishes. Finding one that celebrated a local tradition in the US was quite exciting. I’m not aware that my hometown in California has a specialty, unless you count chain restaurants… hah!

Whoopies pre oven

Big cake cookies

The recommended filling for the Shoo-Fly Whoopies was a caramel frosting. All I can say – it was YUMMY!

Sugar for frosting

Frosting filling

My whoopies turned out GIANT sized, which I suppose is only a problem if you are watching your caloric intake. I have since halved the size of scoop to make much smaller whoopies so they are still an indulgent treat, but with less guilt.

Whoopies piled up high

Finished whoopie pies

Have you tried homemade whoopies yet? They are in a different league to anything you might find in the store, now matter how much the label says you can taste the difference.

What do you get someone who has a sweet tooth for their 90th birthday? A giant chocolate cake, that’s what!

Martin’s pop turned the big nine-oh last weekend and to celebrate family and friends gathered from across the globe (all the way from Canada!). I needed a cake that would serve the crowd and knock the socks off as well, so I turned to my new favourite baking book – Baked In America. Those David’s really know what they’re doing.

I had a tough choice narrowing which layer cake recipe to make and finally decided on Coke Layers. Coca-cola and chocolate? You can’t get more indulgent, really…

So here goes, my adventure in a triple layer chocolate indulgence.

To get started, I melted butter with coca-cola in a bowl over simmering water.

Butter and cola

Then added three types of chocolate – plain, milk and super dark 81% chocolate. Seriously chocolatey… oh yeah… and marshmallows. (I think I gained 10 lbs just writing that sentence.)

Chocolate and marshmallow

Once the chocolate, butter, cola and marshmallows were all melty and gooey, I let it cool to room temperature and sorted the dry ingredients. Oh yeah, there’s more chocolate.

Dry ingredients

Once the chocolate, butter, marshmallow and cola mixture cooled, I added it to the eggs and sugar. It’s key to let a hot chocolate mixture cool to room temp, otherwise you’ll get scrambled chocolate eggs… yuck.

4 bowl process

This mixture makes 3x 9 inch layers.

Fresh from the oven

As recommended, I used a chocolate fudge frosting, which combines sour cream and melted chocolate.

ready for frosting

frosting in progress

And voila! A frosted triple layer chocolate cake!

finished

ready for celebration

Pop loved the cake, as did everyone at the party. He had a few helpers to blow out the candles.

make a wish

Happy birthday, Pop! Here’s to 90 great years and more to come…

Layers

There’s so much to catch up on! Feb has been a VERY hectic month. And by hectic, I mean I didn’t even get a chance to enjoy a baking/cooking project since Valentine’s day. Thankfully, it’s now March and I have been able to slow down a bit and get back in the kitchen.

I love entertaining and throwing dinner parties, so whenever my husband’s family from Canada come to town I always make sure we put on a good spread.  This time we went with Tex-Mex for the meal – serving carnitas, black beans, fresh salsa, mexican rice, corn salad and homemade tortillas.  To follow, I thought a cheesecake would be the perfect foil.

I recently purchased a new baking book called ‘Baked in America‘.  If you didn’t know already, I am an American living in the UK.  This book is written by two Americans living in the UK. Perfect!  I am smitten with this book and am going to try out as many recipes from it as possible. But, before I get ahead of myself, let’s start with the first one. Enter the clotted cream cheesecake.

This was the second time I have ever attempted to make a cheesecake and I was pretty pleased with the results.  I poured over the cheesecake chapter taking in all of the two Davids’ tips and recommendations. So, here’s how it went:

I used a springform tin, as you do with a cheesecake, but I wrapped the bottom with foil to make it easier to remove the base to serve. This was a great tip from the book. Also, the cheesecakes I grew up with had a graham cracker crust. It’s difficult to find graham crackers in the UK and when you do find them, they are like £7 a box in specialty shops like Selfridges Food Hall. Anyway, digestives are the next best alternative, but mixing brown sugar into the digestive and butter mixture makes the crust taste like graham crackers. Top work, sirs!

digestive biscuit crust

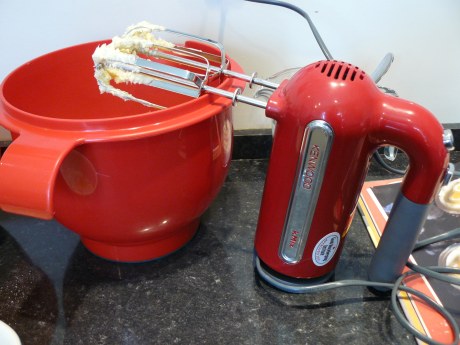
There is a lot of cream in this cheesecake recipe. Don’t be afraid…

cheesecake ingredients

mixing it up

I don’t know the difference between a baked cheesecake and a non baked cheesecake. I suppose since I lived in New York, I am more partial to a New York Style cheesecake, which is baked in the oven.

in the oven

The cheesecake looked like a souffle when it came out of the oven.

Souffle pouffe

And then looked like an alien when it cooled. It has a rustic look, which went well with the Tex Mex fiesta.

cooled cheesecake

And once it was sliced, it didn’t matter what it looked like because the texture inside was perfect.

slice of cheesecake

There was nothing left on anyone’s plate.

cleared plate

This cheesecake serves 12 people easy. There were six of us and we sent our guests home with a second helping each.

Cheesecake vultures

This cheesecake recipe will definitely be in high rotation when it comes to desserts. The clotted cream added a flavour and texture that reminded us of ice cream from Cornwall. Since this recipe came out so well, I cannot wait to get started on my next baking adventure out of Baked In America. I just hope it doesn’t make me miss back home too much.

20120304-182056.jpg

English Mum is hosting a ‘Baked With Love Bakeoff’ and now that Owen, my brand new oven, is in full effect, I had to get involved.  I like making Valentine’s day treats for my sweeties and wanted to do something new, so I tried Red Velvet Cupcakes.  I have seen many recipes for Red Velvet Cake, all of which use quite a bit of red food colouring, but the one from Eric Lanlard’s Home Bake is one that does not.  It’s an American style recipe which relies on the chemical reaction between baking soda and white wine vinegar to create the ‘red’ effect.

It was more like a science experiment than baking, but that was part of the fun.

red velvet science experiment

It started out like your everyday cake mixture using the creaming method: butter, sugar, cocoa…

Cocoa powder

Then alternately add buttermilk and flour…

Mix it up

But with this mixture you combine baking soda and white wine vinegar. Vinegar in cupcakes?! okaay…

now for the science bit

Then keep mixing until it becomes a glossy mixture…

glossy mixture

I filled each cupcake cup halfway and popped them in the new oven. (Affectionately named Owen thanks to the suggestion of Leah and Phil).

Owen shows off

Et voila… Cupcakes! They didn’t come out as red as I anticipated, but they taste amazing and are actually really velvety in texture.

Red Velvet Cupcakes

As these cakes are celebrating Valentine’s Day, I decorated them with marshmallow topping (mini G’s favourite) and heart shaped sprinkles.

Valentine's decorations

And they went down a treat with the little love of my life – mini G…

baked with love

Baked with love bakeoff

Last Sunday our oven’s heating element gave up the ghost – again. It happened while we were out on a walk, with a pork leg roasting away. Thankfully, our quick thinking turned it into a pot roast so dinner was saved.

Living without an oven, especially in the middle of winter, is not ideal but we’ve made it work.

So today, we say goodbye to the oven that has seen us through many Christmas dinners, birthday cakes and other baked treats, even Thanksgiving!

20120203-072248.jpg

Watch this space for adventures of breaking in the new oven. I’m just a little bit excited! Now, who wants cake??

In continuing my quest to battle the bulge and lose that extra weight, I am always on the look out for tasty, yet low calorie treats. So when the Baking Mad Healthy Baking challenge arose, I jumped at the chance to be a part of it.  I selected the Apple Strudel recipe since we had access to hand picked apples from a local source. It also happens to be a favourite dessert of my husband from his childhood visits to Austria.

The baking challenge was sponsored by Baking Mad and Silver Spoon Half Spoon sugar, which has half the calories of regular sugar.

This recipe serves 6

650 grams Apples Eating, Cox’s (approx. 5 apples)

30 grams Almonds ground

1 tsp Cinnamon

1/2 tsp Nutmeg

35 grams Half Spoon Granulated Sugar (Silver Spoon)

1 orange finely grated zest**

Approx. 4 tbsp sunflower or grapeseed oil, plus extra for brushing and greasing

6-8 ready made filo pastry

cinnamon and Half Spoon sugar for sprinkling

**I didn’t have an orange, so I used lemon zest as a substitute.

Healthy ingredients

Preheat the oven to 190°C/fan170°C/Gas 5.

Peel, core and thinly slice the apples into a bowl. Add the ground almonds, spices and sugar and orange zest (or lemon zest).

Apple mixture

Unroll the pastry and cover with a damp cloth to stop it from drying out. Taking one sheet at a time brush each sheet of filo pastry with the oil, then place the sheets of pastry on top of each other onto a large sheet of greaseproof paper.

Arrange the apples in a narrow strip, lengthways down the centre of the pastry to within 3cm of each shorter edge.

Strudel construction

Fold the 2 shorter edges over the filling and then fold over 1 long edge and tuck the fruit firmly underneath the pastry. Brush with any remaining oil and fold over the other edge, so that it overlaps by at least 5-6cm.

Before the oven

Carefully transfer the strudel to a large oiled baking sheet. Brush with a little oil. Bake for 35-40 minutes, until crisp and golden.

After the oven

Leave the strudel to cool down slightly. Dust with a light sprinkle of cinnamon and Half Spoon sugar. Serve with greek yogurt.

Apple strudel with greek yogurt

This is a very tasty recipe. You’d never know it was low calorie. The flavours of the apple, almond, cinnamon and Half Spoon sugar worked so well together. The only downside of this recipe is the filo pastry was a bit too chewy around the folded edges. When I make it again, I’ll probably use half the amount of filo.

I had never made strudel before, and after this recipe challenge, I’ll definitely make it again.