Archives for posts with tag: baking

For those of you with reservations about baking something special for loved ones this Valentine’s Day, Kenwood Chef have put together some video tutorials to show you how easy it is. Chocolate cupcakes are a favourite in my house and always a winner no matter the occasion.

Chocolate Cupcakes

Follow along to the video to make your own delicious chocolaty treats.

And here’s the recipe:

Makes: 12

Preparation Time: 5 minutes

Cooking Time: 30 minutes

Difficulty: Level 1

Method

  1. Pre-heat the oven to 180°C/Fan 160°C/Gas 4
  2. Ensure that your ingredients and equipment are at room temperature to reduce the risk of the mixture curdling.
  3. Place the butter and sugar into your mixer bowl and using the creaming beater cream on medium speed until it becomes thick and creamy.
  4. Beat the eggs to together, reduce the speed of the mixer and gradually add the eggs. Ensure that each addition of the eggs is properly incorporated before adding the next amount of the eggs.   Add a teaspoon of the flour after each amount of egg is added.
  5. Once the eggs have been incorporated add the flour, cocoa and baking powder and continue to mix together
  6. Place twelve paper cases into a muffin tray then divide the mixture evenly between them.
  7. Bake for approximately 12 – 15 minutes until they spring back when lightly pressed.

For the chocolate Icing:

  1. Melt the chocolate in a bowl over a pan of hot water; ensuring the base of the bowl doesn’t touch the water.
  2. Place the butter into your mixer bowl and using the creaming beater cream the butter on medium speed until it becomes paler in colour.
  3. Add the icing sugar slowly and mix to combine.  Ensure your splashguard is in place to avoid the icing sugar escaping from the bowl.
  4. When the icing sugar and butter are combined, mix in the melted chocolate until it is an even colour.
  5. Spoon the icing into an icing bag, and pipe onto the cooled cupcakes.
  6. Decorate with your chosen decorations.

And if you’re feeling a bit more adventurous, why not try Tiramisu to complete a romantic Italian inspired meal.  Kenwood Chef makes it easy!

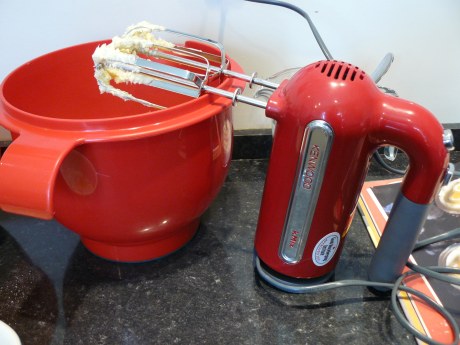
*Disclosure: This is a sponsored post. I have not personally tried this recipe, however I do use a Kenwood Chef mixer and kMix hand mixer that I purchased myself.

New handmixer


Happy baking!

In the baking world, whoopie pies have been all the rage recently. Having tried dried out and tasteless store bought versions back home in the US, I scoffed at this phenomena when it crossed the pond. I thought, “Why would people get into this ‘treat’ when it wasn’t all that tasty?”.
But then after reading about the origin of whoopies in Baked In America, I decided to see what the fuss was all about.

We’re big fans of gingery type cakes so the Shoo-Fly Whoopies recipe seemed the right place to start. Full of goodness like ginger and black treacle, I was suddenly coming around to the deliciousness that would be the whoopie pie.

Black treacle

If you’re not familiar, whoopies are like big cakey cookie sandwiches, filled with a cloud like creamy filling. They can be made into all sorts of different flavor combinations. The Shoo-Fly Whoopie is a take on the traditional ‘Shoo-Fly Pie’ hailing from Pennsylvania Amish country, also where the whoopie pie is said to come from.

Having lived in England for nearly eight years, I have become interested in the origins of regional baked treats and local traditional dishes. Finding one that celebrated a local tradition in the US was quite exciting. I’m not aware that my hometown in California has a specialty, unless you count chain restaurants… hah!

Whoopies pre oven

Big cake cookies

The recommended filling for the Shoo-Fly Whoopies was a caramel frosting. All I can say – it was YUMMY!

Sugar for frosting

Frosting filling

My whoopies turned out GIANT sized, which I suppose is only a problem if you are watching your caloric intake. I have since halved the size of scoop to make much smaller whoopies so they are still an indulgent treat, but with less guilt.

Whoopies piled up high

Finished whoopie pies

Have you tried homemade whoopies yet? They are in a different league to anything you might find in the store, now matter how much the label says you can taste the difference.

20120304-182056.jpg

Last Sunday our oven’s heating element gave up the ghost – again. It happened while we were out on a walk, with a pork leg roasting away. Thankfully, our quick thinking turned it into a pot roast so dinner was saved.

Living without an oven, especially in the middle of winter, is not ideal but we’ve made it work.

So today, we say goodbye to the oven that has seen us through many Christmas dinners, birthday cakes and other baked treats, even Thanksgiving!

20120203-072248.jpg

Watch this space for adventures of breaking in the new oven. I’m just a little bit excited! Now, who wants cake??

20120115-085552.jpg

Happy new year!

I’m kicking off this new year with a new cookbook. I’ve had much success from the Primrose Bakery Cupcake book, I am really looking forward to getting stuck into their Baking book this year.

20120105-210922.jpg

Watch this space for many baking treats!

We’ve been given a large quantity of pears from the in law’s garden, almost so many we’re not sure if we’ll be able to put them all to good use. I’ve been digging through my cookbooks to find inspiration. Thanks to Sarah Raven’s Garden Cookbook, I decided to make a Pear and Almond Tart. We chose this one as it would be fantastic to eat but also freezable so that we can enjoy later on in the season.

To quote my husband, Martin, “When pears are at their best they’re one of the most indulgent fruit experiences you can have.”

With the decision made of what to make, we got started.

Tart batter

I enlisted the help of Martin to help cut up pears.

Pears

We assembled the ingredients into blind baked sweet pastry shell and topped with an apricot glaze.

Apricot glaze

The tart is ready to go into the oven.

Pre cooded

And now is out of the oven.

Finished Tart

We shared the tart at our first instalment of Pub Whiteman.

Pub Whiteman

The tart was very tasty. Pears and almonds are a fantastic combination. Since the pears weren’t pre-cooked, they still retain their shape and texture, rather than becoming a mush in the cooked tart.

I’ll definitely keep this recipe for future use. I’m also looking forward to enjoying the slices of pear and almond tart waiting in the freezer. YUM!

Today it has officially felt like Summer has ended. By the calendar we still have 2 weeks, but with the remnants of Hurricane Irene passing through the weather is cold and blustery. I thought a batch of lemon cupcakes would help brighten up the day for mini G upon his return from school.

Lemon Zest

Lemon cake is his favourite, so this will be a nice surprise. I consulted the Primrose Cupcake book and used their Lemon Cupcake recipe with a few minor modifications:

110g unsalted butter, at room temperature
225g caster sugar
2 large eggs (mine were fresh from a friend’s chickens)
150g self-raising flour
125g plain flour
90ml semi-skimmed milk
30ml freshly squeezed lemon juice
1tsp (roughly one lemon’s worth) grated lemon zest
1tbsp natural plain yogurt

Preheat oven to 160 ˚C (fan)/180˚C/350˚F/gas mark 4
Line a 12 hole muffin tray with regular size cupcake cases.

In a large bowl, cream the butter and sugar together until fluffy. Add the eggs, one at a time, to the creamed butter and sugar and beat well.

In a jug, combine the milk, lemon juice and yogurt. Alternate adding the flours and milk to creamed butter mix as follows – add one-third of the flour and mix well. Add half the milk mixture and mix well. Add another third of flour and mix well. Add the reaminder of the milk and mix well. Finish by adding the last third of flour and the lemon zest and beat well.

If the mixture looks like it is curdling slightly, don’t panic – simply add another spoonful of plain flour and beat well.

New handmixer

Spoon out the mixture evenly between the cases and bake in the oven for 25 minutes. Use a cake skewer in the centre of one the cupcakes to check they are cooked through. They will appear quite a light golden brown colour even when cooked.

Leave in the tin for 10 minutes and the place carefully on a wire rack to cool completely.

Fresh out of the oven

Mini G prefers his cakes plain, so I’ve left the frosting, but these cupcakes go well with either vanilla or lemon buttercream.

Ray of sunshine

Lemon adds a bit of sunshine on a very blustery day.

Mini G and I were invited to a friend’s house for a play date and I thought it would be nice to bring mini cupcakes for elevenses. Another friend of ours has a gluten intolerance, so I turned to Harry Eastwood’s Red Velvet and Chocolate Heartache as her recipes all feature the choice of using either rice flour for gluten free or plain flour for non gluten free.

Ingredients

Another brilliant feature of her recipes is that she substitutes various vegetables for butter. This particular one used butternut squash.

Butternut squash

cupcake batter

Mini cupcakes are perfect for elevenses. The kids love them and the go well with a cup of tea for the adults.

Baked cupcakes

I like to decorate the tops of cupcakes when I can. As this recipe was featuring vegetables in place of butter and rice flour instead of plain flour, I decided to use the recently launched Jealous Sweets, which are both gluten free and vegetarian friendly.

Jealous Sweets

The Jealous Gummy Heaven bears were a perfect topping for the kids and adults alike, they added colour and fun to the petite cakes.

Jealous Sweets on cupcakes

Yum… they went down a treat!

While not exactly a wrap up of the events at CyberMummy, it is inspired by the fantastic event.

(starting with a small rant)
The recurring theme during CyberMummy11 was ‘niche’ – that to stand out, you needed to find your niche. I think niche is becoming a buzz word that is useful to sum up what makes a blog interesting or diversifies it from the rest. To be honest, it’s not niche that drives me to look or read certain blogs, certainly the subject matter is important, but most importantly it is the quality of the writing or photos or the aesthetic of the blog. ‘Niche’ will only get you so far.
(stepping off the soap box now).

I’m a new blogger, but I have been a blog reader for many (many) years. I had been thinking about starting a blog for years really. I ran a website back in 2004 that was set up like a blog, but was mainly there to promote the bands I worked with. I didn’t consider myself a blogger. I left that up to the New York bloggerazzi at the time (The Modern Age, Melody Nelson, New York Doll, Jinners, Divestar, etc). I was just the hanger-on. I thought about setting up a blog when I moved from the US to the UK but I didn’t think anyone would care. I thought about setting up a blog when Mini G was born, but my life soon became occupied with taking care of a brand new little dude. I finally took the plunge earlier this year in January and I am kicking myself for not having had the courage or the discipline to do it sooner.

What kick started my motivation was reaching out to bloggers through my job.  I work at a PR Company and we reach out to writers of blogs for various clients and campaigns. I wanted to know what the ‘secret sauce’ was to receive positive responses. This then prompted me to figure out how blog platforms work in general. What kind of code can you embed on a blog? (The geek in me is showing) How do photos work on a blog? What are bloggers writing about? Anyway, I wanted to learn more.

I bake, I love baking, I love reading about baking so I read a lot of baking blogs. I thought yes! I finally found my voice. I can write about baking. I photograph everything I bake already. I am going to start a baking blog, but because I also love other things like TV, funny things that Mini G does and other kitchen related things, I decided on a title that encapsulated it all… hence ‘Cupcakesandotherstuff’.

Cupcakephotopanel **I didn’t bake this cupcake, but I did photograph it during @cosmicgirlie’s photo panel**

And now, I am learning more. I still don’t know what the ‘secret sauce’ is for getting bloggers to respond or cover stories, but on this journey I have discovered that I love writing my blog. And I know it will give me more insight, perspective and enthusiasm which will cross over to my work.

EricaSarahHolly

I am very glad I wanted to learn more because otherwise, I wouldn’t have heard about CyberMummy. I wouldn’t have met all of these amazing – yes, absolutely amazing – women (and men) and bloggers who all have something to share and something I can learn from. I was inspired by Sarah Brown. As a politician’s wife, you can sometimes forget that she is a mom, just like me. But she made a point that really resonated with me. In her keynote speech she said, “Social networks give you a voice to enable change”. It’s amazing to think of the power and influence one has with a blog, Facebook page or Twitter account. And listening to Rachel Johnson reminded me that once you publish something, it’s out there – whether in print or in cyberspace, so make sure you are behind what you say 100%.

MariaErica

And, if I hadn’t wanted to learn more, I wouldn’t have met new friends like @mummytips and @verybusymama and @mim_tweeta and @cosmicgirlie and there are way too many to list here (this blog post is already the longest I’ve ever written!).

Soooo… to wrap it all up, through this journey I have found my niche… it’s just being me.